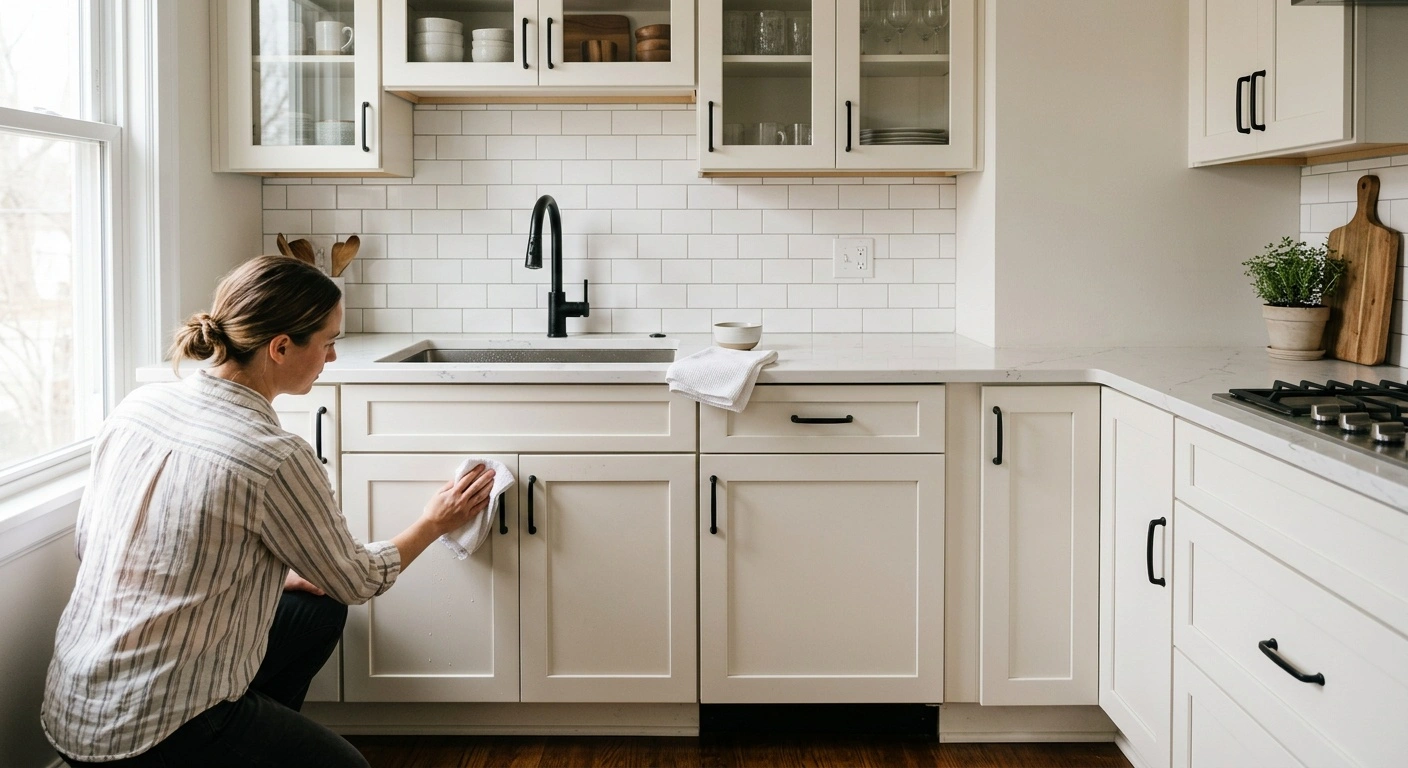
Cabinet Cleaning and Maintenance Tips begin with the gentlest fix: wipe spills promptly with a soft, damp cloth. Wash greasy areas with diluted dish soap, then dry the surface immediately. Moisture around sinks, hardened cooking grease, and harsh cleaners cause much of the damage often blamed on age.
Use a white microfiber cloth so you can see the dirt and avoid transferring dye to pale paint. Work from clean areas toward dirty ones. Before cleaning a visible surface, test your method inside a door.
Never soak cabinet doors or spray cleaner directly onto them. Liquid can collect in panel grooves, seams, hinge cups, and along edge banding. Pay close attention to door edges because manufacturers may apply a thinner finish there.
Regular light cleaning causes less damage than an occasional attack with degreaser and a scrub pad. If mild soap cannot remove a mark, identify the cabinet material and finish before using a stronger product.
Cabinet Cleaning and Maintenance Tips for Routine Care
For most sealed painted or stained cabinets, add a few drops of mild dish soap to warm water. Choose a non-bleach formula such as Dawn. Dampen a clean microfiber cloth and wring it until it feels barely wet.
Wipe wood in the direction of the grain. On painted surfaces, use smooth, straight passes. Follow with a second cloth dampened with plain water, then dry the area with a third cloth. Rinsing removes soap residue that can trap dust and leave a hazy film.
Apply the solution to your cloth, not the cabinet. Spray can enter seams, unsealed edges, hinge cups, and gaps around floating wood panels. Clean one door at a time, including the handle and the area behind the door edge.
Dust exposed cabinet tops and door profiles monthly. Wash commonly handled surfaces every one to three months. If you fry food often, wipe cabinets beside the range each week.
Removing Cooking Grease Without Damaging the Finish
Start with diluted dish soap, even when the grease has hardened. Hold the damp cloth against the spot for 20 to 30 seconds before wiping. This brief contact softens the film without flooding the joint.
Make several gentle passes instead of scrubbing hard. Use a soft toothbrush only in carved details or frame corners that a cloth cannot reach.
Avoid abrasive powders, scouring sponges, stiff brushes, and melamine foam pads such as Mr. Clean Magic Eraser. These products remove sheen and may polish a permanent bright spot into a matte finish. Full-strength Simple Green and concentrated citrus or alkaline degreasers can also damage cabinet coatings.
Use a strong degreaser only when the cabinet manufacturer approves it. Do not clean cabinets with mineral spirits, acetone, denatured alcohol, or paint thinner. If mild soap fails, stop before cleaning turns into refinishing.
Cleaning Around Knobs, Pulls, and Hinges
Grease collects behind knobs and at the ends of pulls. Over time, wiping around the hardware leaves a dark outline. If removal is simple, take off one piece at a time with the correct screwdriver.
Keep each screw with its matching hardware. Support a pull while loosening its screws so it cannot spin and scratch the door. Clean and dry the exposed cabinet finish before reinstalling the hardware.
Tighten each screw until snug, but do not force it. Brass, nickel, and black hardware may have a clear protective coating. Metal polish can strip that coating or create uneven bright spots, so use mild soap unless the manufacturer recommends another cleaner.
Do not flood concealed hinges with cleaner or cooking oil. For a squeaky hinge, wipe the hinge clean and shield the cabinet finish. Then place a tiny amount of dry PTFE lubricant at the pivot.
Match the Cleaner to the Cabinet Finish
Choose a cleaner based on the cabinet coating, not the door’s appearance. A white door might use painted maple, painted MDF, thermofoil over MDF, or plastic laminate. Each material responds differently to water, heat, and cleaning products.
MDF takes paint smoothly, but water can permanently swell a raw edge. Particleboard is a separate material and should not receive the same treatment as plywood. Plastic laminate handles wiping well, although water can enter a damaged seam and swell the panel beneath it.
Thermofoil consists of vinyl film formed over a substrate. Heat from ovens, toasters, and other appliances can loosen it. Solid wood and veneer usually have a clear coating, and that coating is the surface you clean.
Always test your method in an inconspicuous spot. Stop if the cloth picks up color or the sheen changes. A tacky surface also signals finish damage.
Painted Cabinets
Clean fully cured painted cabinets with diluted mild dish soap. Dry joints and edges promptly. Avoid ammonia, chlorine bleach, alcohol, abrasive cleaners, and melamine foam because they can discolor or wear through paint.
White and pale finishes quickly show coffee, tomato sauce, hand oils, and metal rub marks. Deep navy and matte black often reveal fingerprints and polished patches. Gentle, frequent cleaning limits the need for aggressive scrubbing.
Fresh latex and waterborne cabinet finishes may feel dry within hours. However, they can require up to 30 days to cure fully. During that time, clean only when necessary with a barely damp, soft cloth.
Leave doors open long enough to keep freshly painted edges from sticking. Protect them from cookware, fingernails, and hard impacts. For chips, apply several thin coats of the original paint instead of one thick blob.
If paint keeps peeling near a sink or dishwasher, find the moisture source. Repeated touch-ups will not solve an active leak or regular steam exposure.
Stained and Clear-Coated Wood Cabinets
Clean stained cabinets with a barely damp cloth and mild dish-soap solution. Wipe in the direction of the grain, then dry the wood. The stain usually sits beneath a protective film finish.
Common film finishes include conversion varnish, lacquer, polyurethane, and waterborne clear coat. The condition of that coating determines which cleaning methods are safe. Avoid vinegar, ammonia, alcohol, silicone furniture polish, and oily “feeding” products unless the manufacturer approves them.
Silicone polish can cause fisheyes and adhesion problems during later refinishing. Heavy wax buildup also traps grime in door profiles. Most modern clear finishes need cleaning, not added oil or polish.
A pale, cloudy ring often indicates trapped moisture rather than surface dirt. Do not try to scrub through it. Dry the area, improve ventilation, and ask a finisher to inspect persistent cloudiness.
Twice a year, check the finish near the sink, dishwasher, trash pull-out, and frequently handled edges. Repair worn areas before water reaches bare wood or veneer.
Laminate and Thermofoil Cabinets
Use mild dish soap and a soft cloth on laminate and thermofoil. Give seams and edges extra attention. Avoid abrasive pads, powdered cleansers, solvent cleaners, and steam cleaners.
Steam and heat can soften adhesive. Moisture entering a loose edge can also swell the MDF or particleboard underneath. Dry seams immediately after cleaning.
If thermofoil starts lifting, move nearby heat sources and leave the loose film alone. Pulling it can enlarge the damaged area. A professional may reattach a small section, but widespread delamination usually requires a replacement front.
Direct toaster, kettle, and countertop-oven heat away from thermofoil doors. Install any heat shields required by the appliance or cabinet manufacturer. Every few months, check nearby doors for bubbles, curling edges, shrinkage, or discoloration.
Oiled and Waxed Wood Cabinets
Oiled or waxed cabinets may lack a continuous protective film. Dust them with a dry microfiber cloth. For spots, use a barely damp cloth unless the finish manufacturer specifies a compatible soap.
Water can darken worn oil finishes, raise the grain, and enter exposed end grain. Dry moisture immediately, especially along door edges.
Do not apply oil just because a cabinet looks natural. Oil placed over lacquer, varnish, or an unknown coating can leave a sticky residue. If you know the original finish, renew it according to the manufacturer’s directions.
Linseed oil, tung-oil products, and Danish oil release heat while curing. Their soaked rags and paper towels can ignite. Spread used rags flat outdoors, away from buildings and combustible materials, until completely dry.
Alternatively, submerge oily rags in water inside a sealed metal container. Follow local disposal rules for the finish and used materials.
Control Water, Heat, and Indoor Humidity
Wipe standing water near sinks immediately. Check the underside of the countertop overhang and the top edges of sink-base doors. These areas often hold moisture after the visible spill disappears.
Each month, inspect the garbage disposal, trap, dishwasher connection, refrigerator water line, and shutoff valves. Swollen shelf edges, rusted hinge screws, water stains, or musty odors can signal a long-running leak.
Shut off the water before tightening or replacing a supply connection. Call a licensed plumber for new connections or repairs beyond basic maintenance.
Run the range hood while cooking to limit grease and steam. In bathrooms, use the exhaust fan during showers and afterward. Position countertop appliances so they vent heat and steam in front of wall cabinets, not underneath them.
Solid wood expands and contracts as humidity changes, so seasonal gap changes can be normal. A solid wood panel in a frame-and-panel door must float within its frame. Never glue that panel in place.
Adjust Cabinet Doors and Drawers Before Replacing Them
A sagging door or uneven gap often needs a hinge adjustment, not a new door. First, tighten loose mounting screws by hand. Stop when they feel snug because overtightening can strip wood, MDF, or particleboard.
European concealed hinges often include separate controls for side-to-side position, depth, and height. Screw arrangements vary by hinge model. Consult the hardware instructions if you cannot identify each adjustment.
Turn one adjustment screw only a quarter-turn at a time. Close the door and check the gap after each change. Keep paired doors from rubbing, and do not force a hinge to the end of its adjustment range.
If a screw spins without tightening, limit use of the door until you repair the mounting point. Match the repair to the cabinet material. Replace cracked hinge cups, bent hinge arms, and crumbling substrates instead of adjusting them further.
Correcting Drawer Problems
Empty a dragging or crooked drawer before testing it. Excess weight can imitate a hardware problem. Next, look for utensils, pan handles, or liners catching inside the cabinet.
Check the slide screws and confirm that both runners remain parallel. Side-mount slides need proper clearance on both sides. Undermount slides rely on correctly positioned locking devices and rear brackets.
Clean exposed slide tracks with a dry cloth or a vacuum brush. Do not pack ball-bearing slides with grease because it attracts food debris and sawdust. Use only lubricant approved by the slide manufacturer.
If an undermount drawer drops, twists, or comes loose, inspect the front locking clips first. Do not replace the entire slide until you check those parts. Split drawer boxes, loose bottoms, bent runners, and failed mounting holes require hardware or woodworking repairs.
Plan Touch-Ups and Refinishing Safely
You can often repair minor chips with a careful touch-up. Widespread peeling, sticky coatings, swollen panels, and deep wear need more extensive work. Before sanding or stripping painted cabinets in a pre-1978 home, test the coating for lead.
Disturbing lead paint releases hazardous dust. Contractors must follow the EPA Renovation, Repair and Painting Rule when it applies. Homeowners should also use lead-safe methods and follow local requirements.
Use dust collection and ventilation while sanding. Wear at least a properly fitted N95 respirator for dust. A loose disposable dust mask does not provide equivalent protection.
An N95 does not protect against solvent fumes. Chemical strippers and solvent-based finishes may require organic-vapor cartridges selected for that specific product. Follow the safety data sheet, provide ventilation, and confirm that the respirator fits correctly.
Do not use methylene chloride paint strippers. Federal rules prohibit their sale for consumer paint and coating removal. If stripping remains necessary, consider a safer non-methylene-chloride product and test it in a hidden area.
Shut off power before working near outlets or switches. Turn off the water before disturbing plumbing supply lines. Hire a licensed professional for new electrical, plumbing, or gas connections.
Spraying cabinet coatings requires controlled ventilation, careful masking, suitable respiratory protection, and safe handling of flammable products. A professional finisher can manage these risks. Replacement often makes more sense when panels have swollen, joints have failed, or thermofoil has released across several doors.
Follow a Practical Cabinet Maintenance Schedule
A maintenance schedule helps catch small problems before they require refinishing. Adjust the timing to match how you use the room. Cabinets near ranges, sinks, dishwashers, trash pull-outs, and pet bowls need more frequent care.
Treat each cleaning session as an inspection. Check door edges, seams, hardware mounts, and cabinet floors beneath plumbing. Look for changes in color, texture, alignment, or odor.
Do not apply wax, oil, or polish on a fixed schedule. Most modern film finishes need routine cleaning instead. Recoat a surface only when you know the finish and have compatible product instructions.
| Cabinet finish or material | Routine cleaning | Inspection interval | Expected maintenance |
|---|---|---|---|
| Painted latex or waterborne finish | Clean spots promptly and wash handled areas every 1–3 months | Every 6 months | Touch up chips with a compatible coating; allow new finishes up to 30 days to cure |
| Stained wood with a clear film finish | Dust monthly and damp-clean every 1–3 months | Every 6 months | Repair worn clear coat before moisture reaches bare wood; avoid routine oil and silicone polish |
| Plastic laminate | Wipe spills immediately and clean generally every 1–3 months | Every 6 months | Check seams and edge banding for lifting or swelling |
| Thermofoil | Wipe spills promptly and clean generally every 1–3 months | Every 3–6 months near heat | Look for bubbles, shrinkage, discoloration, and loose edges; control appliance heat |
| Oiled or waxed wood | Dust monthly and spot-clean with minimal moisture | Every 3–6 months | Renew only with a known compatible finish when the surface shows wear |
| Cabinet hardware and drawer slides | Wipe handles as needed and vacuum debris from tracks | Every 6–12 months | Tighten screws, adjust hinges, and replace cracked clips or bent parts |
Build Habits That Protect Cabinets Long Term
Use knobs and pulls instead of opening doors by their painted edges. Dry wet hands before reaching for the sink-base cabinet. Keep damp towels off doors and clean spills from pull-out hardware before residue reaches the slides.
Empty crumbs from drawers regularly. If you use a washable sink mat, lift it often and inspect underneath. A mat can hide a slow leak as easily as it catches a spill.
Run the range hood whenever cooking creates grease or steam. Position kettles, coffee makers, and toaster ovens so their exhaust clears upper doors. Keep the dishwasher closed until its drying cycle ends to limit bursts of steam near drawer fronts.
Adjust a hinge as soon as a door begins to rub. Continued use can loosen screws, chip paint, and enlarge mounting holes.
The core Cabinet Cleaning and Maintenance Tips are simple: use mild cleaner, little water, a soft cloth, and immediate drying. Stop if the surface turns tacky, changes sheen, sheds color, or begins to swell. Diagnose the material and finish before continuing.
Prompt leak repairs and small hardware adjustments protect cabinets better than aggressive annual cleaning. Cabinet surfaces last longest when their finish remains intact. Control water, heat, grease, and friction before they reach the substrate underneath.