Living Room Cabinets work best when their dimensions match what they need to hold. Copying kitchen cabinetry across a whole wall often creates excess depth and visual weight. A stock base cabinet measures 34.5 inches high and 24 inches deep. A countertop brings the finished height to about 36 inches.
That depth can crowd a modest room. Media bases often measure 18 to 21 inches deep, while bookcases usually need only 10 to 12 inches. Stock cabinet widths typically range from 9 to 48 inches in 3-inch increments. Custom makers can size drawers, audio compartments, and fitted bookcases for the available space.
Wall cabinets generally measure 12 to 13 inches deep and come in 30-, 36-, and 42-inch heights. These familiar sizes can simplify a built-in. However, the design still needs fillers, finished end panels, trim, and balanced proportions. It should relate clearly to the television, fireplace, windows, and seating rather than resemble relocated kitchen cabinets.
Standard Dimensions for Living Room Cabinets
Choose cabinet dimensions according to the books, electronics, records, games, or household items you plan to store. A 12-inch-deep shelf holds most hardcovers. Oversized art books and storage baskets may need 14 to 16 inches. Vinyl records require about 13 inches of clear interior height and depth, plus finger room and space for dividers.
Television consoles often measure 18 to 24 inches deep. Receivers, amplifiers, plugs, and cable bends consume more room than their front panels suggest. Remember that a nominal 18-inch cabinet provides less usable interior depth. The back, doors, and face frame all take up space.
Preserve at least a 36-inch walkway along routes that people use regularly. Allow more space where the route crosses a doorway or busy seating area. Hinged doors must clear coffee tables, ottomans, and fireplace tools. Drawers need their full extension length, plus standing room for the user.
Shallower cabinetry often works better in a compact room.
| Cabinet or feature | Typical practical dimensions | Best use | Important limitation |
|---|---|---|---|
| Stock base cabinet | 34.5 inches high by 24 inches deep; 9 to 48 inches wide in 3-inch increments | Deep closed storage or a substantial built-in | May project too far into a small room |
| Reduced-depth media base | About 18 to 21 inches deep | Television equipment, games, and wide drawers | Check equipment depth, plugs, and ventilation before ordering |
| Wall cabinet | 12 to 13 inches deep; commonly 30, 36, or 42 inches high | Upper closed storage or cabinets above a desk-height surface | Requires fastening to studs rather than drywall alone |
| Bookcase | 10 to 12 inches deep | Standard books and display objects | Wide shelves need thicker material or reinforced front edges |
| Record storage | At least about 13 inches of clear interior height and depth | 12-inch vinyl records | Loaded compartments require strong shelves and joinery |
| Toe kick | About 4.5 inches high and 3 inches deep | Standing access to a countertop-height cabinet | Often unnecessary on low consoles or furniture-style units |
| Display shelf spacing | Usually 10 to 14 inches clear, adjusted for the objects | Books, framed photographs, and small decor | Fixed shelves limit future changes |
Choosing Freestanding, Modular, or Built-In Cabinetry
Freestanding cabinets offer the most flexibility because they can move with the room layout. They suit renters and spaces where the cabinet should look like separate furniture. Look for a finished back, sturdy anti-tip hardware, and adjustable levelers. Anchor any unit that could tip because of its height, doors, or loaded shelves.
Modular cabinetry combines repeated box sizes with fillers and trim for a fitted appearance. It usually costs less than fully custom work because manufacturers use established sizes and construction methods. However, standard boxes can leave awkward gaps around fireplaces, windows, and uneven walls.
Custom built-ins use sloped ceilings, deep alcoves, and irregular walls more efficiently. They also keep shelf thicknesses, door proportions, and equipment openings consistent across the installation. The tradeoff is permanence.
Later removal may expose unfinished flooring, missing baseboard, wall damage, or altered electrical work. Design a permanent installation around the room’s architecture, not around one television that will eventually need replacement.
Planning Living Room Cabinets Around the Room
Start with fixed features. Record every door, window, supply register, return-air grille, outlet, switch, fireplace, and floor transition. Measure the wall at the floor, middle, and ceiling because few walls remain perfectly straight or plumb.
Leave scribable fillers wherever cabinetry meets a wall. A filler measuring about 1.5 to 3 inches often provides enough material for an uneven surface. It also prevents doors from binding against nearby casing. Deep window trim, fireplace stone, or badly angled walls may require wider fillers.
Keep cabinet doors out of doorways and main walking routes. At an inside corner, allow enough filler for the handle and door edge to clear the neighboring cabinet. If two cabinets meet at right angles, test every door and drawer on a scale drawing. Do not assume both units can operate at the same time.
Projecting stone creates another common conflict. A drawer beside a fireplace surround can strike the stone even when the cabinet box fits.
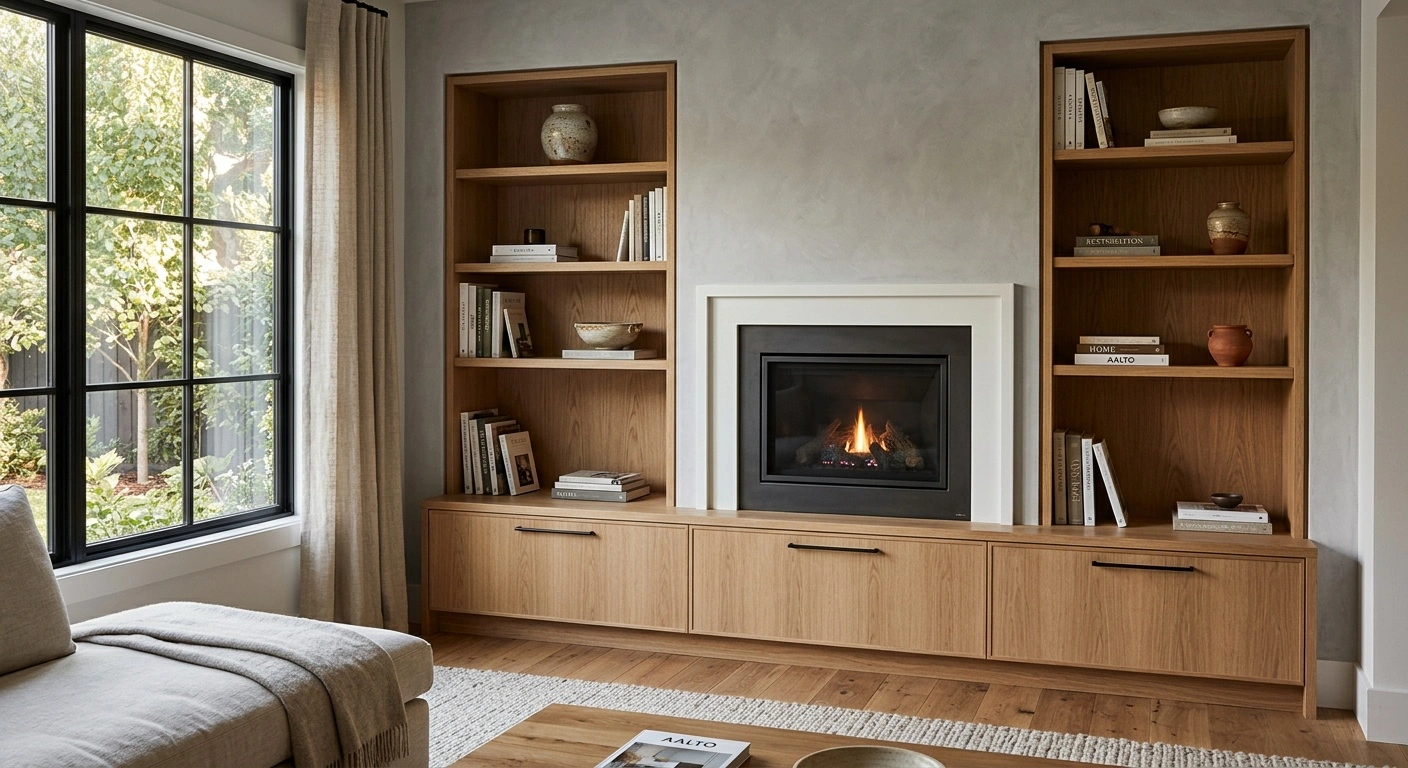
A balanced composition does not always require symmetry. Matching towers can frame a centered fireplace. An off-center window or doorway may work better with one tall bookcase and a lower cabinet run. That arrangement often looks more deliberate than two unequal towers.
Media Cabinets and Television Walls
A television cabinet must handle ventilation, wiring, remote-control signals, and future equipment changes. Measure each component, including its knobs, feet, antennas, and power plugs. Account for the bending radius of HDMI and speaker cables. The listed chassis depth rarely tells the whole story.
Use removable backs, cable grommets, or an accessible wiring chase. Good access prevents you from removing the television whenever a cable fails.
Heat causes many problems in closed media storage. Follow the equipment manufacturer’s clearance and ventilation instructions. Use open shelves, vent grilles, or quiet active ventilation when the equipment requires them. A few random holes in the back will not reliably cool a high-powered receiver.
Warm air needs an exit, while cooler room air needs an entry point.
Adjustable shelves provide flexibility, but a heavy amplifier may need a fixed shelf or rated slide-out platform. Infrared remotes may not work through solid wood doors. Radio-frequency and network-controlled devices often work inside closed compartments, though you should test them first.
Avoid fitting permanent trim tightly around the television. Replacement screens rarely have identical exterior dimensions.
Designing Useful Cabinet Interiors
Wide drawers often work better than deep lower cabinets with doors. They bring stored items into view and make the back of the cabinet easier to reach. Choose full-extension slides for games, blankets, media, and serving pieces.
A shallow top drawer can organize remote controls, batteries, charging cables, and game controllers. Deeper drawers below can hold larger objects. In homes with young children, do not create a low drawer that functions as a climbing step. If the layout requires one, use properly rated slides and anchor the cabinet securely.
Adjustable shelves suit books and changing displays, but wide spans can sag under concentrated weight. A 3/4-inch plywood shelf outperforms a similar particleboard shelf. Heavy loads may still require a solid-wood front edge, center divider, or shorter span.
Record collections carry substantial weight. Divide them into narrow bays and provide a solid load path to the floor.
Pull-out trays can improve access to printers, turntables, and audio equipment. Confirm that each slide rating exceeds the combined weight of the equipment and tray. Interior outlets add convenience, but a licensed electrician should complete new electrical connections. Keep all connections accessible for future service.
Doors, Drawers, and Open Shelving
Open shelves keep books and display pieces visible, but they collect dust and can make a wall look busy. Closed lower cabinets hide cables, toys, games, and mismatched containers. This combination provides practical storage without making the entire installation feel heavy.
Glass doors reduce dust while preserving a lighter appearance. Clear glass suits orderly collections. Lightly textured glass softens the view without fully hiding the contents. Both options still show fingerprints.
Inset doors sit flush within a face frame, with a narrow reveal on all four sides. This furniture-like construction complements traditional millwork. It costs more because the cabinetmaker must fit each opening and door accurately. Seasonal wood movement and an uneven installation also show more clearly.
Full-overlay doors cover most of the cabinet frame. They create a cleaner contemporary appearance and tolerate small fitting variations better.
Soft-close concealed hinges and full-extension drawer slides prevent slamming in frequently used rooms. Pocket and retracting doors can conceal a television or bar. However, they require deep side cavities and specialized hardware. Include those cavities in the design before construction begins.
Matching Cabinet Construction to the Decor
Shaker doors work with traditional, transitional, and restrained contemporary rooms. Their flat center panels and square frames provide detail without heavy ornament. The inside edges collect some dust, but they remain easier to clean than deeply raised panels or applied molding.
Flat-panel slab doors create a quieter wall and suit long, low media cabinets. For wide doors, engineered cores and stable sheet materials usually move less than broad solid-wood panels.
Warm white cabinetry pairs well with oak floors, soft gray stone, and aged brass or brushed nickel hardware. Muted sage complements natural oak and walnut. Deep navy creates strong contrast beneath white walls and pale quartz. Keep maintenance in mind, since dark paint shows shelf-edge dust and glossy finishes reveal fingerprints and dents.
Walnut adds pronounced grain and visual weight. White oak offers a lighter, straighter grain that works with matte black or warm brass hardware. Cherry darkens with light exposure, so areas behind displayed objects may change color at different rates.
Frame-and-panel doors made from solid wood need room for seasonal movement. The center panel should float within its grooves. Gluing it in place can cause cracks or distorted frames as humidity changes.
Materials That Hold Up in a Living Room
Cabinet-grade plywood makes a strong cabinet box. It holds fasteners well and provides better stiffness than particleboard of a similar thickness. Finish exposed plywood edges with solid-wood edging, veneer tape, or a face frame.
Particleboard differs from plywood. Manufacturers make it from compressed wood particles and resin, then use it in economical cabinets and furniture panels. It performs adequately in dry, properly supported installations. However, wet edges and damaged screw holes are difficult to repair.
MDF takes paint well because its smooth surface has no visible grain. It works for painted doors, end panels, and decorative trim. Water can permanently swell an unsealed edge, so use careful detailing near wet bars, plants, exterior doors, and heavily mopped floors. Paint alone does not make MDF waterproof.
Thermofoil creates a smooth, easy-clean surface over an MDF core. Excess heat can cause delamination. Avoid it beside fireplaces, hot electronics, or any area that may exceed the manufacturer’s temperature limit.
Solid wood works well for face frames, edging, and doors. Wide solid panels still need joinery that accommodates seasonal expansion and contraction.
Installation, Wall Loads, and Utility Safety
Installers must secure tall and wall-hung cabinets to structural framing. Drywall anchors cannot safely replace stud attachment. Loaded upper cabinets may carry several hundred pounds of books, records, or serving pieces.
Locate and mark the studs, then confirm their positions with more than one method. Use structural cabinet screws with the correct length and rating. Brittle drywall screws do not belong in structural cabinet installation. Drive fasteners through a solid hanging rail or reinforced back rather than a thin decorative panel.
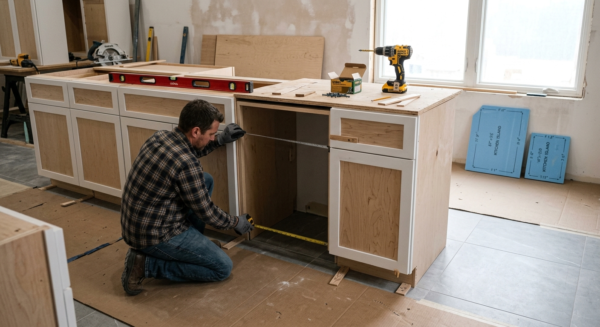
For upper cabinets, attach a level temporary ledger board to the studs. Rest each box on the ledger and shim it plumb without twisting the cabinet. Next, clamp neighboring face frames together and fasten each cabinet to the framing.
Use two people for this work. One person cannot safely hold a cabinet level while protecting the wall and finished floor. Remove the ledger only after securing every box.
Shut off power before working near outlets, switches, or concealed wiring. Likewise, shut off water before working near supply lines. Hire a licensed electrician for new or relocated electrical connections and a licensed plumber for new plumbing.
Follow the fireplace manufacturer’s clearance requirements and all applicable local codes. Never assume nearby woodwork is safe simply because an existing mantel uses similar material.
Living Room Cabinet Costs
Cabinet boxes account for only part of the project cost. For broad 2026 planning in medium-cost U.S. markets, stock or ready-to-assemble components may cost $200 to $700 per linear foot. That range covers cabinetry and basic trim before extensive installation, countertops, lighting, or electrical work.
A fitted semi-custom installation may cost about $600 to $1,500 per linear foot. Fully custom, site-fitted cabinetry often starts near $1,200 per linear foot. Premium veneers, inset doors, integrated lighting, complex finishes, and fireplace detailing can push costs above $3,000 per linear foot.
Use these figures as budgeting ranges rather than national averages. Short runs often cost more per foot because design, delivery, setup, and finishing costs apply to fewer cabinets.
Materials, door style, finish, hardware, wall condition, and site access all affect the quote. Painted inset cabinetry generally costs more than stained full-overlay work. The fitting and surface preparation demand more labor. Scribing to stone, matching historic trim, building curves, and spraying furniture-grade finishes also add time.
Compare quotes line by line. Ask whether each price includes finished ends, fillers, molding, shelves, backs, hardware, delivery, and installation. Also check for wall repair, touch-ups, and debris removal. A low cabinet price can become expensive once the contractor adds these necessary items.
Building a Cabinet Plan That Will Age Well
Start with an inventory and measure the largest objects you need to store. Do not estimate from memory. Draw a wall elevation that shows every opening, outlet, register, and piece of trim. Then add the cabinet depth to a floor plan so you can check walkways and door swings.
Divide long shelf runs into structurally sensible bays. Long, uninterrupted shelves often sag under books. Use adjustable interiors where storage needs may change, but keep the exterior proportions consistent.
Provide access panels for wiring, valves, and serviceable equipment. Never bury a junction box or plumbing shutoff behind a permanent cabinet back. Allow for uneven floors and walls, then cover those tolerances with scribed fillers, end panels, and trim.
Test the proposed depth before ordering. Painter’s tape or a cardboard mock-up can show whether a 24-inch base feels too bulky.
Good cabinetry looks integrated because its dimensions, reveals, hardware positions, and finishes follow a consistent plan. It does not need to fill every inch of wall. Balance closed storage with open space, and preserve access for future repairs. The result will control clutter without overwhelming the room.