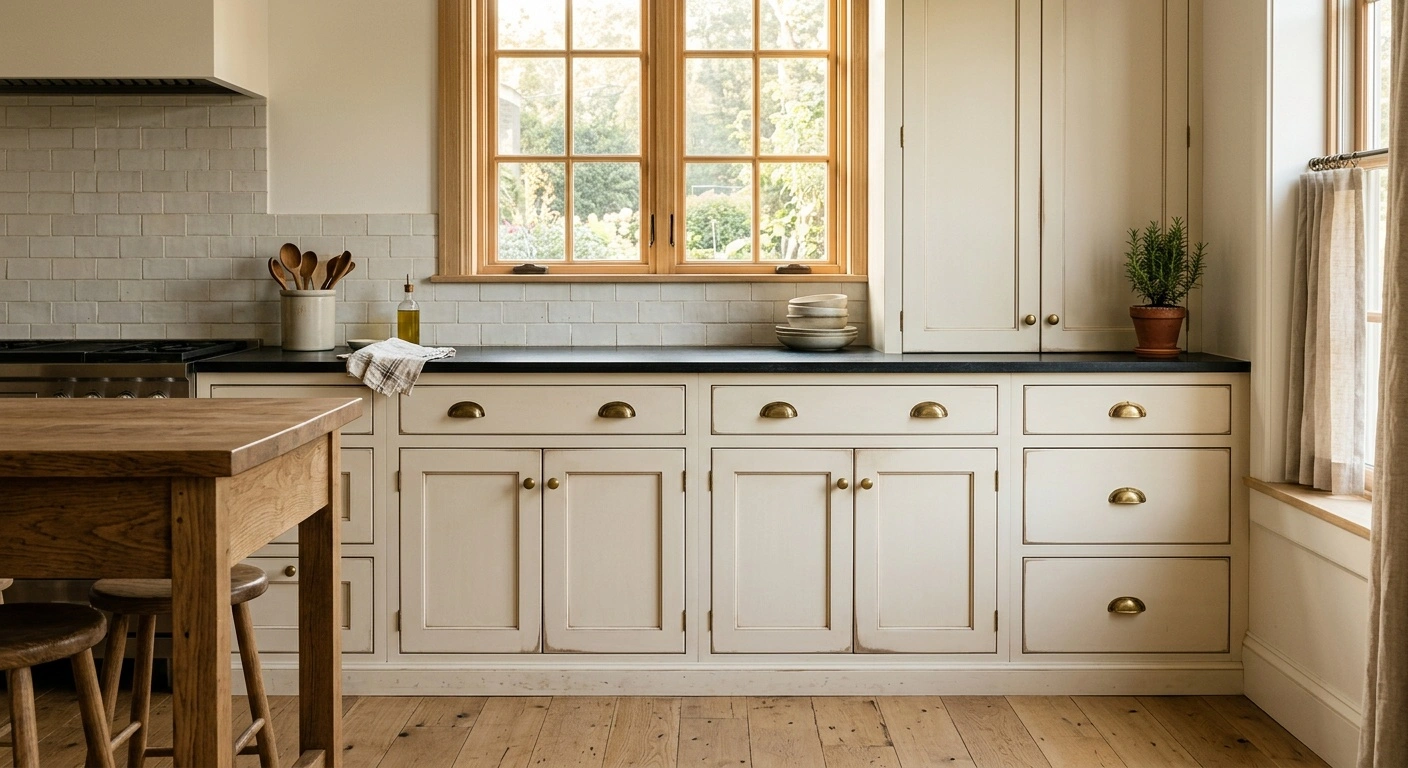
Distressed Cabinets use controlled wear, rubbed edges, glaze, dents, and layered color to make new cabinetry look decades old. The style draws from painted furniture and working cupboards worn by years of handling. Hands typically remove paint near knobs, corners, and door edges, while residue darkens joints and recesses. A convincing finish copies these patterns instead of scattering scratches across every surface.
Distressing can work on Shaker, raised-panel, beadboard, or flat-panel doors. It also suits overlay and inset construction. However, the finish changes the cabinet’s appearance, not its underlying quality.
For a U.S. project quoted in 2026, allow roughly $500 to $1,500 beyond a standard painted finish for light hand-rubbed wear across 20 doors. Layered colors, glazing, dents, and chipped effects may add $1,500 to $4,000. These figures serve as planning ranges rather than national averages. Door count, local labor rates, finish systems, and the amount of hand detailing can change the final price.
Factory finishing may also cost differently from job-site work. Inset construction, custom colors, and new doors are separate upgrades. A contractor should not bury them inside a vague “distressed finish” charge.
What Distressed Cabinets Actually Look Like
Good distressing concentrates wear where regular use would create it. Common areas include knobs, lower door corners, projecting edges, and frequently used drawers. The center of a recessed panel usually stays quieter because hands rarely rub it.
A dark glaze can settle into molding profiles and rail-to-stile joints to imitate accumulated residue. A lighter undercoat may show through selected edges. Small dents and wormhole marks can suit rustic wood, but they should look sparse and irregular. Repeated patterns quickly appear artificial.
Each separate finish operation increases the cost. A painted door with lightly sanded edges may need only one extra hand-finishing step. A layered finish may require primer, undercoat, topcoat, selective rub-through, glaze, and clear protection. Every layer adds application, drying, and handling time.
Raised-panel doors and applied moldings take longer because they contain more profiles to detail. Ask for a full-size sample door rather than a small color chip. The amount and placement of wear determine whether the finish looks natural or theatrical.
How the Door and Finish Are Constructed
Edge Wear and Rub-Through
Rub-through distressing removes part of the top color from selected edges. This process can expose wood, primer, or a contrasting base coat. The most believable finishes use narrow wear around corners and hardware instead of broad bare patches.
On a five-piece Shaker door, rail and stile edges provide natural high points. The flat center panel should show little wear. Raised-panel doors offer more profiles, so they can support heavier distressing without looking arbitrary.
The exposed layer affects durability. Bare wood absorbs grease and moisture more readily than sealed wood. Therefore, the cabinet shop should keep exposed areas small or protect the completed effect with a compatible clear finish.
Avoid breaking through paint on MDF edges. Damaged paint can expose fuzzy fibers, and water causes permanent swelling. A sealed MDF center panel remains a stable choice for painted cabinetry. However, MDF does not create attractive bare-wood rub-through.
Glaze, Antiquing, and Layered Color
A glaze is a translucent colored coating applied to corners, profiles, and joints. The finisher then wipes it from broad surfaces. Brown glaze warms cream, tan, and wood-tone finishes. Charcoal or black glaze creates stronger contrast on gray, sage, and deep blue.
Glaze emphasizes every recess, including uneven joints. As a result, it can make poor door construction more obvious. Heavy glaze also creates visual clutter around panel edges, especially in a small kitchen.
Layered-color distressing places one paint color over another. The finisher selectively removes the upper coat to reveal the lower color. Subtle combinations, such as warm white over muted taupe, usually age better than bright, high-contrast pairings.
All coating layers must remain chemically compatible, particularly when the system includes a clear topcoat. Ask the cabinet shop for a coating manufacturer’s approved system. Mixing unrelated primers, paints, glazes, and clear coats can cause adhesion or curing problems.
Overlay, Inset, and Reveal Lines
Distressing does not determine whether a door uses inset or overlay construction. An overlay door sits in front of the cabinet frame or box edge. An inset door sits flush within a face frame, with a consistent reveal around all four sides.
Standard overlay construction usually costs less because it requires less precise fitting. Inset doors need carefully sized openings, accurately placed hinges, and room for seasonal movement. Those requirements add labor.
Dark glaze makes reveal lines more prominent. It can flatter a well-built inset kitchen, but it also exposes inconsistent gaps. Full-overlay doors create a cleaner field with less visible face frame, which can calm a detailed finish.
On solid-wood frame-and-panel doors, the center panel must float inside the frame. The cabinetmaker should never glue it into the grooves. Humidity causes wood to expand and contract. During a dry winter, movement may reveal a paint line at the panel edge without indicating door failure.
Where Distressed Cabinets Work Best
Distressed Cabinets suit rooms that already contain visible texture. Compatible materials include oak flooring, handmade tile, soapstone, honed granite, butcher block, and brick. The finish works especially well on furniture-style islands, freestanding hutches, pantry cabinets, and bathroom vanities.
Light edge wear on Shaker doors can connect traditional cabinetry with a modern layout. Simple lighting, restrained hardware, and quiet countertops keep the design balanced. Too many decorative surfaces can make the room feel crowded.
This style often conflicts with glossy large-format porcelain, mirror-finish counters, polished quartz with sharp veining, and handle-free cabinetry. Those materials emphasize precision and newness, while distressed paint suggests age and repeated use.
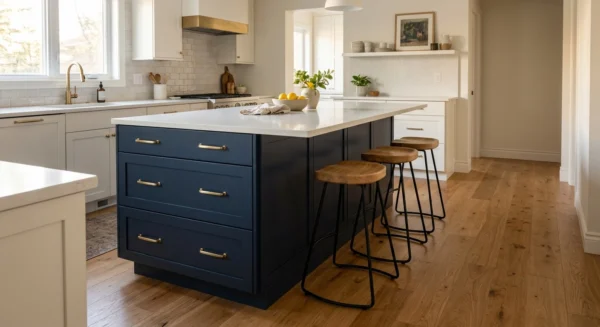
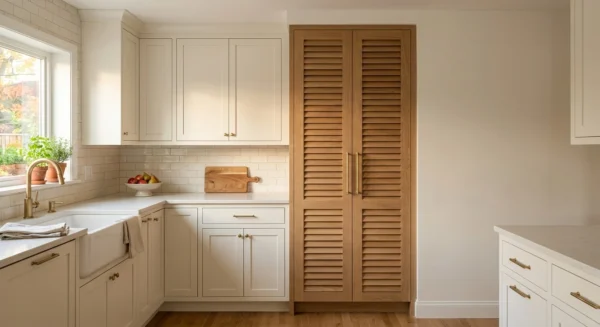
Distressing every door can also overwhelm a small kitchen filled with short doors and drawer fronts. Instead, limit the finish to an island or tall pantry. Keep the perimeter cabinets cleanly painted.
Colors, Woods, and Finishes That Age Well
Paint Colors
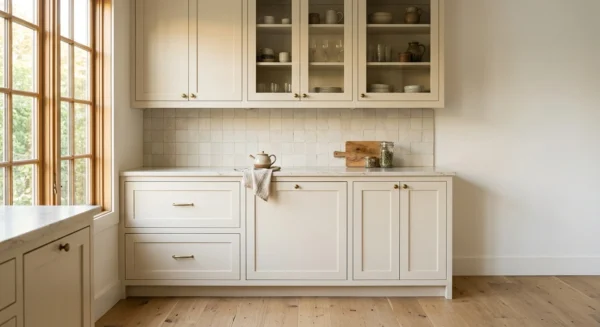
Warm whites, muted greens, soft greiges, and deep blue-black shades accept distressing naturally. Benjamin Moore White Dove can support a brown glaze without becoming too cold. Sherwin-Williams Accessible Beige takes gentle edge wear without creating harsh contrast.
Benjamin Moore Saybrook Sage pairs well with oak floors and warm brass. Sherwin-Williams Naval can support small areas of wood-tone rub-through on an island. Always test the exact color under the kitchen’s daylight and electric lighting. Glaze may make profiles look several shades darker.
Pure white with dark brown glaze creates strong contrast and often looks deliberately antiqued. That combination may date faster than a low-contrast finish. Oil-based alkyd coatings can amber over time, especially on white and cream cabinetry. Modern waterborne cabinet coatings generally retain pale colors better.
Dark matte paint shows fingerprints and polishing marks around pulls. Satin or low-sheen finishes usually clean more easily than dead-flat paint. They also avoid the reflective appearance of a glossy coating.
Wood Species
Oak suits distressing because its open pores and strong grain hold glaze. Quarter-sawn white oak creates an orderly, architectural pattern. Plain-sawn red oak displays busier cathedral grain.
Knotty alder accepts dents and rustic marks readily. However, its softness makes it vulnerable to real damage in active kitchens. Cherry naturally darkens with age and light exposure, so heavy antiquing can hide one of its most useful visual qualities.
Maple has fine, relatively closed grain and works well under paint. Heavy wiping stains may look blotchy without careful preparation. Walnut usually benefits more from a clear or lightly toned finish because its natural color already provides depth.
Solid-wood frame-and-panel doors need freely floating center panels. For painted doors, a sealed MDF panel inside a solid maple or poplar frame can reduce seasonal movement. Keep every MDF edge protected from water.
Counters, Floors, and Hardware
Lightly distressed cream cabinets pair well with honed black granite, soapstone, or quiet quartz. Sage cabinetry works with white oak floors, warm white counters, and aged-brass or brushed-nickel hardware. Deep navy or charcoal often works best on an island beside a natural maple, walnut, or white oak perimeter.
Medium oak cabinetry can support black iron or oil-rubbed bronze hardware. However, too many dark decorative details can make the room look themed. Use simple cup pulls, round knobs, or restrained bar pulls.
Keep every pull aligned consistently. A decorative finish cannot hide poor hardware placement. Avoid combining distressed doors with chipped tile, rough reclaimed floors, ornate corbels, patterned counters, and several metal finishes. One or two aged elements can establish the intended character.
How to Keep the Look From Dating Badly
The most adaptable version uses a familiar door shape and low-contrast distressing. A simple Shaker door with softened corners remains easier to repaint than a heavily gouged door. It also fits a wider range of kitchen styles.
Wormholes, chain marks, crackle medium, and dark glaze create a much stronger period look. Heavy Tuscan-style glazing, ornate raised panels, rope molding, and contrasting rub-through closely reflect an earlier decorating cycle. These details may suit an old-world interior, but they rarely support a broadly current design.
Limiting distressing to an island or freestanding cabinet makes later changes easier. You can repaint a sound door after proper cleaning, deglossing, and priming. Deep dents and gouges will remain unless a refinisher fills them first.
Glazed profiles require more preparation because pigment stays in each recess. Thermofoil offers no practical shortcut. Sanding cannot create convincing wear in vinyl film, and heat from ovens or countertop appliances can cause delamination.
Cleaning and Maintaining Distressed Cabinets
Clean distressed paint with a soft microfiber cloth, warm water, and a small amount of mild dish soap. Dawn Free & Clear is one suitable example. Wipe again with clean water, then dry the surface. Test any cleaner inside a door first.
Avoid abrasive pads, powdered cleansers, chlorine bleach, acetone, and strong alkaline degreasers. These products can polish, soften, discolor, or remove the decorative coating. Do not soak glazed recesses or worn edges because moisture may work beneath damaged paint.
Remove cooking grease from painted and glazed cabinets each month. Clean frequently touched pull areas as soon as they look dull. Every three to six months, inspect sink bases, dishwasher-adjacent doors, and cabinet edges for swelling, loose coating, or water entry.
Clear-coated wood generally needs prompt spill removal and occasional mild cleaning. Do not apply furniture oil unless the cabinetmaker recommends it. Waxed finishes may need renewal under the original maintenance schedule. Catalyzed shop finishes usually need cleaning rather than routine recoating.
New latex and waterborne coatings may dry quickly but can need up to 30 days to cure fully. During that period, handle doors gently and leave the bumpers in place. Avoid aggressive cleaning, and do not hang damp towels over door tops.
Clear topcoats can protect an antiqued effect from direct wear. However, they complicate spot repairs because differences in sheen may remain visible. Keep a labeled sample door or finish board for future color, glaze, and sheen matching.
Safety When Distressing Existing Cabinets
Before sanding or scraping old paint, identify the coating’s age. Test painted cabinets in homes built before 1978 for lead. Sanding, scraping, or heat stripping lead paint can release dangerous dust.
Paid contractors who disturb paint in pre-1978 homes may need to follow the EPA Renovation, Repair and Painting rule. Confirm the rule’s scope before work begins. Do not treat possible lead paint as an ordinary sanding project.
Wear a properly fitted N95 respirator when sanding non-lead coatings, and connect the sander to effective dust extraction. Lead work requires the correct containment, cleanup methods, and personal protective equipment. Follow current federal, state, and local requirements.
Stripping and spraying also require strong ventilation. Solvent finishes and chemical strippers may require a properly fitted respirator with organic-vapor cartridges. A dust mask does not protect against fumes.
Federal rules ban consumer sales of methylene chloride paint strippers. Choose a safer, non-methylene-chloride product that works with the existing coating, and follow its label. Move doors to a controlled work area instead of spraying solvent coatings inside an occupied kitchen.
Rags soaked with linseed oil, tung oil, Danish oil, or similar finishes can self-heat and ignite. Spread them flat outdoors to dry away from structures and ignition sources. Alternatively, submerge them in water inside a sealed metal container before arranging proper disposal.
Shut off power before working around outlets or switches. Turn off the water before removing cabinetry near supply lines. Hire qualified, licensed trade professionals for new electrical, plumbing, or gas connections.
What to Specify in a Cabinet Quote
Define the distressing level in writing instead of accepting a phrase such as “antique finish.” Specify the door style, wood or MDF components, base color, undercolor, glaze color, and sheen. Also state whether the finisher will seal areas that appear bare.
List every surface that will receive the treatment. These surfaces may include doors, face frames, end panels, open shelves, and matching trim. A factory sample should show a door corner, rail-to-stile joint, panel profile, and hardware area.
Ask whether the sample represents the normal range or the lightest application. Hand work varies between doors. Confirm whether the shop can match replacement doors later, but expect some variation in hand-applied glaze.
The quote should separate door construction, inset or overlay fitting, distressing, glazing, and protective topcoat costs. Clear pricing lets you reduce decorative labor without weakening cabinet construction. Keep plywood boxes, hinges, drawer slides, and other functional components in separate specifications.
A Vintage Finish That Still Supports Modern Use
The strongest distressed kitchen uses modern construction where performance matters and aging where the eye notices it. Choose durable boxes, quality concealed hinges, full-extension drawer slides, sealed sink cabinetry, and properly fitted doors. Decorative wear should never compensate for weak construction.
Particleboard is not plywood, even when both sit behind the same attractive door. Compare box materials separately from finish samples. Keep decorative wear light enough that you can still spot grease, water damage, and failing paint.
A restrained Shaker door, quiet glaze, and one warm metal finish will usually age better than a heavily themed treatment. Place stronger aging on an island, hutch, or vanity if you do not want it throughout the room.
Finally, judge the full-size sample from several feet away and then inspect it up close. The wear should look plausible, the construction should feel sound, and routine cleaning should not expose raw material. With those details in place, distressed cabinetry can add convincing age without sacrificing daily function.