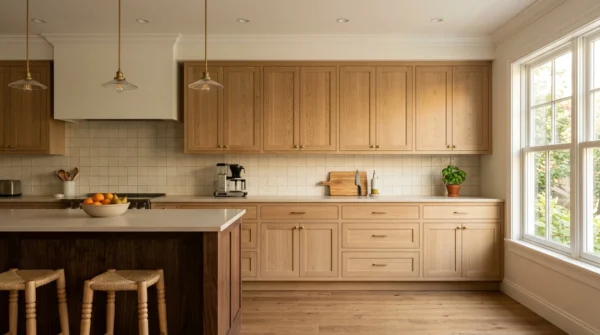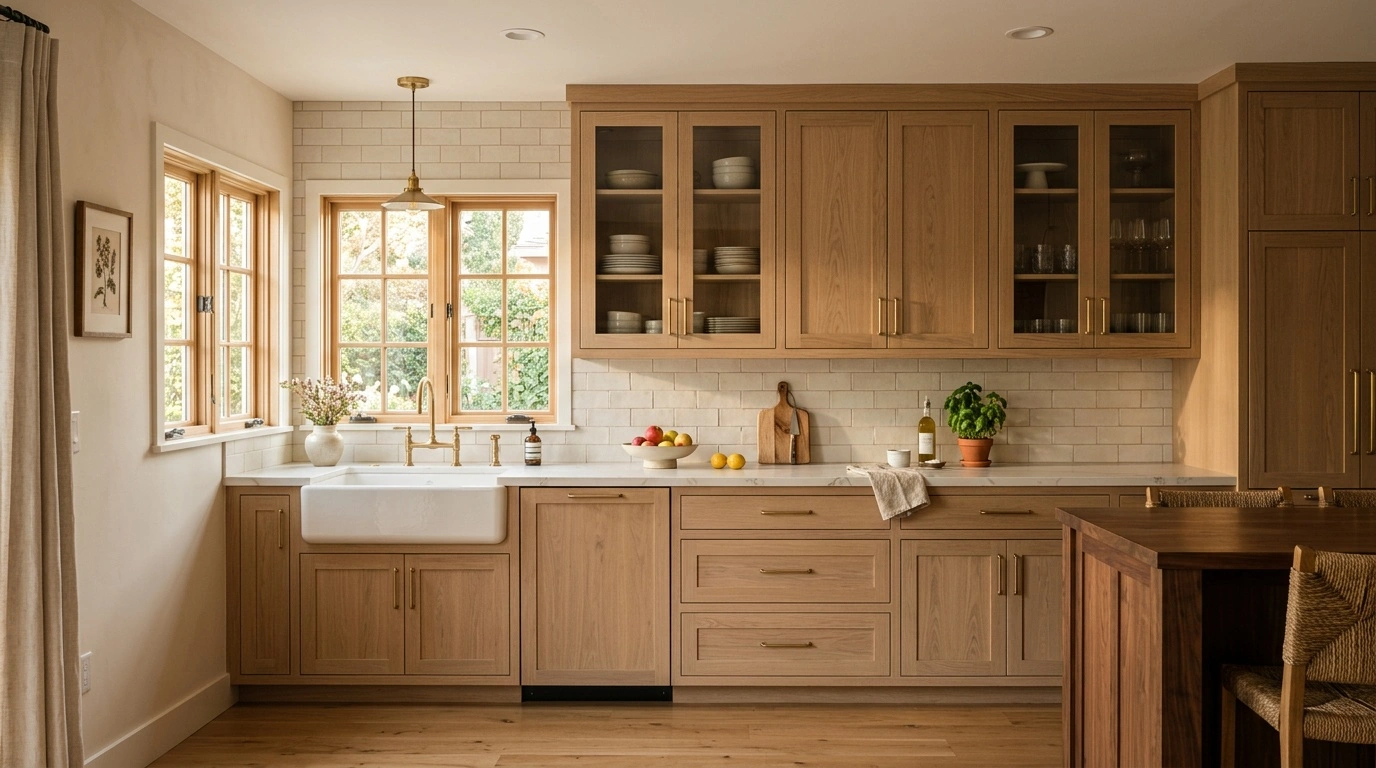
Stained Cabinets reveal the grain, color variation, and pore structure of real wood instead of hiding them under opaque paint. The look can range from pale white oak to dark-toned maple. However, a good finish still reads as wood rather than one flat brown surface.
Historically, woodworkers protected cabinetry with oil, wax, shellac, or varnish. Today, most stained finishes combine a coloring step with a separate protective topcoat. Stain supplies the color, while the clear coat resists water, grease, and abrasion.
Stained cabinetry may match the price of a standard factory finish or carry a finish-tier premium. Much of the added cost comes from hardwood doors, matched veneers, and careful grain selection. Paint can hide MDF panels, mineral streaks, mismatched boards, and minor sanding flaws. A clear or lightly colored finish exposes every detail.
Custom finishes may include hand-rubbed stain, toner, glaze, and color-matched end panels. Each step adds labor. Inset construction costs more for a separate reason because each door requires tight, even reveals.
Why Stained Cabinets Have More Visual Depth
Stain does more than turn wood brown. Pigment collects in open pores and sanding scratches. Dye penetrates more evenly and can add clear color without hiding as much grain.
Oak’s large pores become more pronounced under pigment stain. Maple looks smoother because it has a tighter grain, but inconsistent preparation can make it blotchy. Finishers may use dye, a sealing washcoat, pigment stain, toner, and clear coat in separate stages. This process controls both color and contrast.
Sheen also changes the sense of depth. Matte and low-sheen coatings keep the grain visible and disguise fingerprints. Gloss makes colors appear deeper, but it highlights dents, dust, and uneven surfaces.
Raking daylight reveals medullary rays in quartersawn oak and ribboning in some walnut boards. It also shows the natural color changes that develop as cherry ages. These variations belong to the wood. If you want nearly identical doors, choose an opaque painted finish.
Door Construction and Reveal Choices
A stained Shaker door usually has five pieces. Two vertical stiles and two horizontal rails surround a flat center panel. On solid-wood doors, that panel must float inside the frame as humidity changes.
Manufacturers often use veneered plywood or wood-veneered MDF for the center panel. These materials remain flatter and avoid pale lines caused by seasonal contraction. MDF accepts paint well, but unfinished MDF cannot imitate natural grain. It also swells permanently when water reaches the core.
Raised-panel doors use a profiled center panel within the same basic frame. Stain emphasizes the panel’s edges and curves. However, grease and dust collect around bevels and inside corners more readily than on flat-panel doors.
Slab doors may use solid lumber, veneered plywood, or veneer over an engineered core. Veneer creates broad, continuous grain without the movement problems of a wide solid board. It is real wood, but its face layer is thin. Aggressive sanding can cut through it and permanently damage the door.
Overlay doors sit in front of the cabinet frame and allow more installation tolerance. Inset doors sit flush inside a face frame, with a narrow gap on all four sides. Stain makes uneven gaps easy to see because each dark opening forms a distinct line.
Inset construction also creates ledges that catch crumbs and dust. Seasonal movement may cause a poorly fitted door to rub. Choose inset cabinetry for its furniture-like proportions, not because a stained finish requires it.
Choosing Wood Species and Stain Color
Choose the wood species before selecting the stain. The species establishes the grain pattern, pore structure, and natural undertone. Dark stain cannot make maple look exactly like walnut. It usually produces dark maple with less visible grain.
Heavy pigment can also bury oak’s cathedral grain and fill its open pores. That treatment removes much of oak’s visual character. Always approve a sample made with the specified species, topcoat, and sheen. A printed stain chip cannot show absorption, grain movement, or chatoyance.
| Wood species | Natural character | Suitable stain direction | Main tradeoff |
|---|---|---|---|
| White oak | Open pores with strong straight or cathedral grain | Natural, light brown, smoked brown, or muted warm gray | Dark pigment can collect in the pores and look coarse |
| Red oak | Pronounced grain with pink or reddish undertones | Medium brown, warm chestnut, or deeper traditional brown | Pale gray often conflicts with the wood’s warm undertone |
| Maple | Tight, subtle grain with occasional curls or mineral streaks | Clear, honey, light amber, or a controlled medium brown | Uneven absorption can cause blotching |
| Cherry | Fine grain that darkens and warms with light exposure | Clear, warm reddish brown, or restrained medium brown | Covered and exposed areas may age at different rates |
| Walnut | Deep brown heartwood with flowing grain and lighter sapwood | Clear or lightly toned brown | Heavy stain can hide the variation that gives walnut its value |
| Hickory | Strong contrast between pale sapwood and brown heartwood | Clear, amber, or medium warm brown | Its dramatic variation can make a large kitchen look busy |
| Birch | Fine grain with variable absorption | Light amber or carefully controlled medium tones | It can blotch and may serve as a budget substitute for maple |
Natural white oak, clear walnut, medium brown oak, and gently warmed maple tend to age well visually. Very dark espresso finishes reveal flour, fingerprints, scratches, and pale edge chips. Orange-heavy cherry and cool gray oak can tie a kitchen to a specific trend cycle. These colors can still work when they support the room’s materials and lighting.
How the Finish System Changes the Result
Stain alone does not provide a complete cabinet finish. A compatible clear coating must seal and protect it. Common options include waterborne polyurethane, oil-based polyurethane, lacquer, and factory-applied catalyzed coatings.
Cabinet shops often choose conversion varnish and similar catalyzed systems for kitchens. These coatings form hard films with strong chemical resistance. Their ventilation and application requirements make them unsuitable for casual indoor use.
Lacquer builds quickly and allows easier repairs than some cross-linked coatings. However, its solvent sensitivity and spray requirements favor controlled shop application. The exact performance depends on the lacquer system and application schedule.
Oil-based polyurethane adds amber warmth to oak, cherry, and walnut. The same warmth can make pale maple look yellow. Waterborne polyurethane preserves a clearer color and produces less odor during application. Product quality and application technique still determine its final appearance and durability.
General Finishes High Performance Water Based Topcoat and Bona Mega ONE are waterborne products. Confirm compatibility with the selected stain and sealer before use. Minwax Oil-Based Polyurethane offers a widely available oil-based option. General Finishes Arm-R-Seal suits controlled horizontal or shop application better than vertical brushing in an installed kitchen.
Some waterborne coatings feel dry long before they fully cure. Certain products need up to 30 days to reach full cure. During that period, handle doors gently and avoid strong cleaners. Do not hang damp towels over door edges.
Ask for the coating family, sheen, cure time, and care instructions in writing. “Stained wood” describes the appearance, not the protective finish.
Pairing Stained Cabinets With Counters, Floors, and Hardware
A room feels more balanced when it combines visible grain with quieter solid surfaces. Active cathedral grain pairs well with lightly veined quartz or honed dark stone. Straight-grain white oak works with warm white, cream tile, muted sage, soapstone, and low-contrast quartz. Walnut often benefits from pale counters and backsplashes that reflect more light.
Flooring needs close attention because two similar wood tones can look like a failed match. Instead of forcing an exact match, create clear contrast or repeat a shared undertone. For example, pair warm oak cabinetry with a slightly darker neutral oak floor.
Avoid placing red-brown cabinets against yellow-orange flooring without checking a full-size sample. Hold the sample vertically beside the floor. This test gives more useful information than comparing two small chips on a desk.
Brushed brass adds warmth to white oak, walnut, and medium brown finishes. Brushed nickel gives warm wood a cooler, quieter counterpoint. Matte black suits pale oak but may disappear against espresso cabinetry.
Simple knobs and slim pulls keep figured wood in focus. Install matching hardware at consistent positions across doors and drawer fronts. Irregular placement becomes especially noticeable when the eye follows continuous grain.
Where Stained Cabinetry Works Best
Stained cabinetry suits kitchens that need warmth, texture, and a surface that can age naturally. It works with Shaker, slab, Craftsman, traditional, and restrained transitional designs. The species and door profile establish most of the style.
Clear or lightly colored oak and walnut can look thoroughly contemporary on flat-panel doors. By contrast, raised panels, decorative glaze, corbels, and ornate crown create a more specific period look. Medium brown oak and cherry reinforce that traditional character.
Dark finishes on both base and wall cabinets can feel heavy in rooms with low ceilings or limited daylight. Consider wood base cabinets with warm white uppers. A stained island with painted perimeter cabinets offers another practical balance.
Highly figured hickory may overwhelm a small kitchen when it covers every visible panel. Limit it to an island, vanity, or built-in when you want concentrated variation.
Several unrelated wood tones can also make a room feel disjointed. Red oak flooring, orange cherry cabinets, a gray-brown island, and yellow butcher block compete with each other. Choose one dominant grain and, at most, one supporting wood. Keep the remaining surfaces quiet.
Designs date faster when they combine several short-lived details. Heavy gray stain, distressed edges, dark profile glaze, and ornate raised panels create a narrowly defined look. A restrained color and simple profile usually offer more flexibility.
Cleaning and Maintaining Stained Cabinets
Use a soft microfiber cloth with warm water and a small amount of mild dish soap. Follow with a clean damp cloth, then dry the surface. Never leave standing moisture along panel edges or veneer seams.
A pH-neutral product such as Bona Cabinet Cleaner may work when the cabinet manufacturer approves it. Test any cleaner inside a door first. The clear topcoat determines chemical resistance, not the stain color.
Pay close attention to sink-base doors and the bottom rail above a dishwasher. Water and steam often reach these areas first. Prompt drying reduces the chance of whitening, swelling, or veneer failure.
Avoid abrasive powders, melamine sponges, steel wool, bleach, undiluted vinegar, strong ammonia, and solvent cleaners. These products can scratch, haze, or soften the finish. They may also remove color where damage has exposed the wood.
Silicone-heavy furniture polish can cause refinishing defects called fisheyes. Oil soap may leave residue on some film finishes. A product does not become universally safe simply because its label mentions wood.
Wipe grease from cabinets near the range each week. Clean the full cabinet run every one to three months, depending on cooking frequency. Once a year, inspect knob areas, caulk joints, sink edges, and dishwasher-adjacent panels.
Factory-catalyzed finishes usually need cleaning rather than periodic recoating. Ask a cabinet finisher to evaluate damaged areas before adding another coating. Oil-finished wood needs more frequent inspection and may require renewal when it looks dry or readily absorbs water.
Managing Fading, Yellowing, Chips, and Uneven Color
Natural wood changes color over time. Cherry usually darkens with light exposure, while walnut may lighten. Oil-based clear coats also develop a warmer amber tone as they age.
Waterborne coatings generally preserve paler colors more effectively. Still, no clear coating completely stops ultraviolet light from changing wood or finish. Move countertop appliances and decorative objects occasionally during the first year. This helps covered and exposed areas age more evenly.
Dark finishes make pale edge chips easy to spot because damage exposes raw wood. For a tiny chip, start with a manufacturer-approved touch-up marker. Add the approved clear repair product afterward, using as little color as possible.
Mohawk Blendal Sticks and Mohawk Ultra Mark markers can repair furniture and cabinet finishes. Accurate color matching takes practice, and markers cannot rebuild a missing corner. Hire a cabinet finisher for deep dents, cloudy moisture damage, worn edges, or widespread peeling.
Adjust the hinges before replacing a door that looks crooked or develops an uneven reveal. European concealed hinges usually offer side-to-side, height, and depth adjustments. Make small changes and support the door while loosening screws.
Also check whether the mounting screws still grip firmly. A door that binds each season may have too little clearance. An improperly glued solid center panel can also cause movement problems.
Refinishing Existing Cabinets Safely
Refreshing a worn clear coat differs greatly from changing dark wood to a pale finish. Stain penetrates below the surface. Removing enough material to expose even raw wood can soften profiles, round edges, or cut through veneer.
A darker toner may shift the color without complete stripping. However, the new coating must bond to the existing finish. Test the full process on one sample door before committing to the entire kitchen.
Cabinets in homes built before 1978 may contain lead paint. Older painted layers may also remain beneath a later wood-look finish. Test before sanding, scraping, or applying heat because these methods can release hazardous lead dust.
Paid contractors working on covered pre-1978 homes must follow the EPA Renovation, Repair and Painting Rule. Check interiors, frames, end panels, and adjacent trim rather than testing only the door fronts.
Wear an N95 respirator while sanding and connect power sanders to effective dust extraction. An N95 filters particles but does not protect against solvent vapors. Sprayed coatings, chemical strippers, and solvent finishes require strong ventilation and suitable protective equipment.
Use a properly fitted respirator with organic vapor cartridges when the product label requires one. Follow cartridge replacement guidance and all manufacturer instructions. Keep ignition sources away from flammable vapors.
Consumer use of methylene chloride paint stripper is banned in the United States. Do not use it for cabinet work. Consumer-labeled, non-methylene-chloride products offer alternatives, including some benzyl-alcohol-based strippers. They still require gloves, eye protection, ventilation, and careful label compliance.
Oil-soaked rags can self-heat and ignite. This hazard applies to linseed oil, tung oil, Danish oil, and other oil-based finishes. Spread rags flat outdoors to dry away from buildings and combustible material.
Alternatively, place them in water inside a sealed metal container. Follow local disposal rules afterward. Never leave oily rags crumpled in a pile, trash can, or closed workshop.
Some projects exceed sensible weekend DIY work. Examples include spraying solvent coatings inside an occupied home, matching factory toner, repairing delaminated veneer, and stripping detailed doors. A professional cabinet finisher can control dust, color, adhesion, and ventilation more reliably.
How to Choose Stained Cabinets That Last
Start with a wood species you genuinely want to see. Then select the door construction and approve a large finished sample. View it upright during morning, afternoon, and artificial light.
Specify the stain color, clear-coat family, and sheen. Avoid vague labels such as “medium walnut.” Ask how the manufacturer handles sapwood, mineral streaks, fillers, end panels, grain matching, and future replacement doors.
For a longer design life, favor visible grain, restrained color, and a simple door profile. Use dark finishes only where the room has enough light. Consider how often fingerprints, flour, and edge wear will show.
Keep water away from seams and wipe away cooking grease before it hardens. Repair exposed wood promptly so moisture cannot enter. Well-built cabinetry will change gradually with light and use. That mellowing creates depth, while the clear finish protects the wood without making it look plastic.